
关于handsome主题的美化和修改的记录,方便以后查找
一:浏览器动态标题
展开查看详情
主题设置 - 开发者设置 - 自定义输出body尾部的HTML代码添加以下代码
<!--浏览器动态标题开始-->
<script>
 var OriginTitle = document.title;
 var titleTime;
 document.addEventListener('visibilitychange', function () {
     if (document.hidden) {
         $('[rel="icon"]').attr('href', "//file.kaygb.top/static_image/tx.png");
         document.title = 'ヽ(●-`Д´-)ノ我藏好了哦!';
         clearTimeout(titleTime);
     }
     else {
         $('[rel="icon"]').attr('href', "//file.kaygb.top/static_image/tx.png");
         document.title = 'ヾ(Ő∀Ő3)ノ被你发现啦~!' + OriginTitle;
         titleTime = setTimeout(function () {
             document.title = OriginTitle;
         }, 2000);
     }
 });
</script>
<!--浏览器动态标题结束-->
二:复制弹窗提示
展开查看详情
在模板目录的header.php文件中引入layer资源文件代码
<script src="//lib.baomitu.com/layer/3.1.1/layer.js"></script>
主题设置 - 开发者设置 - 自定义JavaScript 中添加以下代码
document.body.oncopy = function() {layer.msg('复制成功,转载请保留原文链接!');};
三:复制代码自带版权说明
展开查看详情
将以下JS代码放在post.php的文章内页php
<!--复制代码自带版权说明-->
<script>
document.body.addEventListener('copy', function (e) {
    if (window.getSelection().toString() && window.getSelection().toString().length > 42) {
        setClipboardText(e);
        // alert('商业转载请联系作者获得授权,非商业转载请注明出处哦~\n谢谢合作~(。・`ω´・)');
    }
});
function setClipboardText(event) {
    var clipboardData = event.clipboardData || window.clipboardData;
    if (clipboardData) {
        event.preventDefault();
        var htmlData = ''
            + '著作权归作者所有。<br>'
            + '商业转载请联系作者获得授权,非商业转载请注明出处。<br>'
            + '作者:<?php $this->author() ?><br>'
            + '链接:' + window.location.href + '<br>'
            + '来源:<?php $this->options->siteUrl(); ?><br><br>'
            + window.getSelection().toString();
        var textData = ''
            + '著作权归作者所有。\n'
            + '商业转载请联系作者获得授权,非商业转载请注明出处。\n'
            + '作者:<?php $this->author() ?>\n'
            + '链接:' + window.location.href + '\n'
            + '来源:<?php $this->options->siteUrl(); ?>\n\n'
            + window.getSelection().toString();

        clipboardData.setData('text/html', htmlData);
        clipboardData.setData('text/plain',textData);
    }
}
</script>
<!--复制代码自带版权说明-->
四:头像呼吸光环和鼠标悬停旋转放大
展开查看详情
主题设置 - 开发者设置 - 自定义CSS添加以下代码
.img-full {
width: 100px;
border-radius: 50%;
animation: light 4s ease-in-out infinite;
transition: 0.5s;
}

.img-full:hover {
transform: scale(1.15) rotate(720deg);
}

@keyframes light {
    0% {
        box-shadow: 0 0 4px #f00;
    }

    25% {
    box-shadow: 0 0 16px #0f0;
    }

    50% {
    box-shadow: 0 0 4px #00f;
    }

    75% {
    box-shadow: 0 0 16px #0f0;
    }

    100% {
    box-shadow: 0 0 4px #f00;
    }
}
如果只需要单色呼吸光环,例如红色,可以将关键帧动画改为:
@keyframes light {
    from {
    box-shadow: 0 0 4px #f00;
    }

to {
    box-shadow: 0 0 16px #f00;
    }
}
五:左侧文章图标和评论头像鼠标悬停旋转
展开查看详情
主题设置 - 开发者设置 - 自定义CSS添加以下代码
.img-circle {
    transition: all 0.3s;
}

.img-circle:hover {
    transform: rotate(360deg);
}
六:文章内打赏图标跳动
展开查看详情
主题设置 - 开发者设置 - 自定义CSS添加以下代码
.btn-pay {
    animation: star 0.5s ease-in-out infinite alternate;
}

@keyframes star {
    from {
        transform: scale(1);
    }

    to {
        transform: scale(1.1);
    }
}
七:首页文章列表悬停上浮
展开查看详情
主题设置 - 开发者设置 - 自定义CSS添加以下代码
.blog-post .panel:not(article) {
transition: all 0.3s;
}

.blog-post .panel:not(article):hover {
    transform: translateY(-10px);
    box-shadow: 0 8px 10px rgba(73, 90, 47, 0.47);
}
八:首页头图悬停放大并超出范围
展开查看详情
主题设置 - 开发者设置 - 自定义CSS添加以下代码
.index-post-img {
 overflow: hidden;
}

.item-thumb {
    transition: all 0.3s;
}

.item-thumb:hover {
    transform: scale(1.1)
}
九:文章内头图和图片悬停放大并超出范围
展开查看详情
主题设置 - 开发者设置 - 自定义CSS添加以下代码
.entry-thumbnail {
overflow: hidden;
}

#post-content img {
    border-radius: 10px;
    transition: 0.5s;
}

#post-content img:hover {
    transform: scale(1.05);
}
十:右侧导航栏图标颜色
展开查看详情
主题设置 - 开发者设置 - 自定义CSS添加以下代码
.glyphicon-fire {
color: #ff0000;
}

.nav-tabs-alt .glyphicon-comment {
    color: #495dc3;
}

.glyphicon-transfer {
    color: #0e5458;
}
十一:文章标题居中
展开查看详情
主题设置 - 开发者设置 - 自定义CSS添加以下代码
.panel h2{
text-align: center;
}
.post-item-foot-icon{
    text-align: center;
}
十二:春节倒计时代码
展开查看详情
主题设置 - 开发者设置 - 首页列表最前方广告位添加以下代码
<!--倒计时开始-->
<div class="gn_box">
<h1><font color=#E80017>2</font><font color=#D1002E>0</font><font color=#BA0045>2</font><font color=#A3005C>0</font><font
color=#8C0073>年</font><font color=#75008A>-</font><font color=#5E00A1>新</font><font
color=#4700B8>年</font><font color=#3000CF>倒</font><font color=#1900E6>计</font><font color=#0200FD>时</font>
</h1>
<center>
<div id="CountMsg" class="HotDate">
<span id="t_d">157 天</span>
<span id="t_h">9 时</span>
<span id="t_m">7 分</span>
<span id="t_s">42 秒</span>
</div>
</center>
<script type="text/javascript"> function getRTime() {
var EndTime = new Date('2020/01/25 00:00:00');
var NowTime = new Date();
var t = EndTime.getTime() - NowTime.getTime();
var d = Math.floor(t / 1000 / 60 / 60 / 24);
var h = Math.floor(t / 1000 / 60 / 60 % 24);
var m = Math.floor(t / 1000 / 60 % 60);
var s = Math.floor(t / 1000 % 60);
document.getElementById("t_d").innerHTML = d + " 天";
document.getElementById("t_h").innerHTML = h + " 时";
document.getElementById("t_m").innerHTML = m + " 分";
document.getElementById("t_s").innerHTML = s + " 秒";
}
setInterval(getRTime, 1000);
</script>
</div>
<!--倒计时结束-->
主题设置 - 开发者设置 - 自定义CSS添加以下代码
/* 倒计时开始 */
.gn_box {
padding: 10px 14px;
margin-bottom: 20px;
text-align: center;
background-color: #fff;
}
#t_d{
color: #982585;
font-size: 18px;
}
#t_h{
color: #8f79c1;
font-size: 18px;
}
#t_m{
color: #65b4b5;
font-size: 18px;
}
#t_s{
color: #83caa3;
font-size: 18px;
}
十三:右侧栏加入每日pixiv热榜图片
展开查看详情
Github:https://github.com/mokeyjay/Pixiv-daily-top50-widget
主题设置 - 开发者设置 - 全局右侧广告位添加以下代码
主题设置 - 开发者设置 - 全局右侧广告位添加以下代码
< iframe src = “ https://cloud.mokeyjay.com/pixiv ” frameborder = “ 0 ” style = “ 宽度:240 像素;高度:380 像素;” > </ iframe >
然后修改handsome/component/sidebar.php
找到
<?php _me("广告") ?>
,将"广告"修改为P站每日热门十四:超链接特效
展开查看详情
修改/usr/themes/handsome/assets/css/handsome.min.css删掉下面的内容:
comment-content-true a:hover,.wrapper-lg .entry-content a:hover{
color:#222;border-bottom-color:#222
}
.comment-content-true a,.wrapper-lg .entry-content a{
color:#58666e;border-bottom-color:#222;border-bottom:1px solid #999;word-wrap:break-word;word-break:break-all
}
然后在主题设置 - 开发者设置 - 自定义CSS添加以下代码
/超链接特效/
.comment-content-true a:not(.light-link),
.wrapper-lg .entry-content a:not(.light-link) {
    position: relative;
    margin: auto 4px;
    color: #23b7e5;
    -webkit-transition: color 0.3s;
    transition: color 0.3s;
    -webkit-perspective: 600px;
    perspective: 600px;
    -webkit-perspective-origin: 50% 100%;
    perspective-origin: 50% 100%;
    word-wrap: break-word;
    word-break: break-all;
    white-space: nowrap;
    text-overflow: ellipsis;
    overflow: hidden;
    max-width: inherit;
    width: inherit;
}
.comment-content-true a:not(.light-link):hover,
.comment-content-true a:not(.light-link):focus,
.wrapper-lg .entry-content a:not(.light-link):hover,
.wrapper-lg .entry-content a:not(.light-link):focus {
    color: #fff;
}
.comment-content-true a:not(.light-link)::before,
.comment-content-true a:not(.light-link)::after,
.wrapper-lg .entry-content a:not(.light-link)::before,
.wrapper-lg .entry-content a:not(.light-link)::after {
    position: absolute;
    top: 0;
    left: -4px;
    z-index: -1;
    box-sizing: content-box;
    padding: 0 4px;
    width: 100%;
    height: 100%;
    content: '';
}
.comment-content-true a:not(.light-link)::before,
.wrapper-lg .entry-content a:not(.light-link)::before {
    background-color: #23b7e5;
    -webkit-transition: -webkit-transform 0.2s;
    transition: transform 0.2s;
    -webkit-transition-timing-function: cubic-bezier(0.7, 0, 0.3, 1);
    transition-timing-function: cubic-bezier(0.7, 0, 0.3, 1);
    -webkit-transform: rotateX(90deg);
    transform: rotateX(90deg);
    -webkit-transform-origin: 50% 100%;
    transform-origin: 50% 100%;
}
.comment-content-true a:not(.light-link):hover::before,
.comment-content-true a:not(.light-link):focus::before,
.wrapper-lg .entry-content a:not(.light-link):hover::before,
.wrapper-lg .entry-content a:not(.light-link):focus::before {
    -webkit-transform: rotateX(0deg);
    transform: rotateX(0deg);
}
.comment-content-true a:not(.light-link)::after,
.wrapper-lg .entry-content a:not(.light-link)::after {
    border-bottom: 1px solid #23b7e5;
}
.content-copyright {
    overflow: hidden;
}
十五:标签云颜色
展开查看详情
主题设置 - 开发者设置 - 自定义JS添加以下代码
<!--纯黑标签云-->
let tags = document.querySelectorAll("#tag_cloud-2 a");
let colorArr = ["#000000", "#000000", "#000000", "#000000", "#000000", "#000000"];
tags.forEach(tag => {
    tagsColor = colorArr[Math.floor(Math.random() * colorArr.length)];
    tag.style.backgroundColor = tagsColor;
});

<!--银白标签云-->
let tags = document.querySelectorAll("#tag_cloud-2 a");
let colorArr = ["#C0C0C0", "#C0C0C0", "#C0C0C0", "#C0C0C0", "#C0C0C0", "#C0C0C0"];
tags.forEach(tag => {
    tagsColor = colorArr[Math.floor(Math.random() * colorArr.length)];
    tag.style.backgroundColor = tagsColor;
});

<!--淡蓝标签云-->
let tags = document.querySelectorAll("#tag_cloud-2 a");
let colorArr = ["#ADD8E6", "#ADD8E6", "#ADD8E6", "#ADD8E6", "#ADD8E6", "#ADD8E6"];
tags.forEach(tag => {
    tagsColor = colorArr[Math.floor(Math.random() * colorArr.length)];
    tag.style.backgroundColor = tagsColor;
});

<!--彩色标签云-->
let tags = document.querySelectorAll("#tag_cloud-2 a");
let colorArr = ["#428BCA", "#AEDCAE", "#ECA9A7", "#DA99FF", "#FFB380", "#D9B999"];
tags.forEach(tag => {
    tagsColor = colorArr[Math.floor(Math.random() * colorArr.length)];
    tag.style.backgroundColor = tagsColor;
});

<!--天蓝标签云-->
let tags = document.querySelectorAll("#tag_cloud-2 a");
let colorArr = ["#00BFFF", "#00BFFF", "#00BFFF", "#00BFFF", "#00BFFF", "#00BFFF"];
tags.forEach(tag => {
    tagsColor = colorArr[Math.floor(Math.random() * colorArr.length)];
    tag.style.backgroundColor = tagsColor;
});
如果主题中启用了pjax,还需要将上面代码添加到pjax-pjax回调函数中;
十六:鼠标点击特效
展开查看详情
在主题的footer.php文件中的 < /body>之前添加以下代码
<script type="text/javascript">
/* 鼠标特效 */
var a_idx = 0;
jQuery(document).ready(function($) {
    $("body").click(function(e) {
        var a = new Array("富强", "民主", "文明", "和谐", "自由", "平等", "公正" ,"法治", "爱国", "敬业", "诚信", "友善");
        var $i = $("<span/>").text(a[a_idx]);
        a_idx = (a_idx + 1) % a.length;
        var x = e.pageX,
        y = e.pageY;
        $i.css({
            "z-index": 999999999999999999999999999999999999999999999999999999999999999999999,
            "top": y - 20,
            "left": x,
            "position": "absolute",
            "font-weight": "bold",
            "color": "#ff6651"
        });
        $("body").append($i);
        $i.animate({
            "top": y - 180,
            "opacity": 0
        },
        1500,
        function() {
            $i.remove();
        });
    });
});
</script>
十七:网站加载耗时
展开查看详情
在主题的functions.php文件中添加以下代码
    //加载耗时
        function timer_start() {
            global $timestart;
            $mtime     = explode( ' ', microtime() );
            $timestart = $mtime[1] + $mtime[0];
            return true;
        }
        timer_start();
        function timer_stop( $display = 0, $precision = 3 ) {
            global $timestart, $timeend;
            $mtime     = explode( ' ', microtime() );
            $timeend   = $mtime[1] + $mtime[0];
            $timetotal = number_format( $timeend - $timestart, $precision );
            $r         = $timetotal < 1 ? $timetotal * 1000 . " ms" : $timetotal . " s";
            if ( $display ) {
                echo $r;
            }
            return $r;
        }
然后在/usr/themes/handsome/component/sidebar.php中添加以下代码

    <li class="list-group-item"> <i class="glyphicon glyphicon-time text-muted"></i> <span class="badge
    pull-right"><?php echo timer_stop();?></span><?php _me("加载耗时") ?></li>
实际效果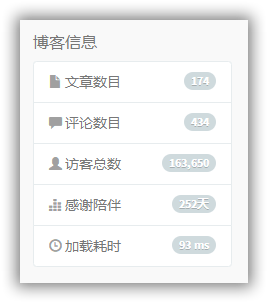
十八:心知天气
展开查看详情
心知天气API申请:https://www.seniverse.com/widgetv3
在/usr/themes/handsome/component/headnav.php中添加以下代码
在/usr/themes/handsome/component/headnav.php中添加以下代码
<!--搜索提示-->
                <ul id="search_tips_drop" class="dropdown-menu hide" style="display: block;top: 30px; left: 0px;">
                </ul>
              <span id="search_submit" class="transparent input-group-btn">
                  <button  type="submit" class="transparent btn btn-sm"><i class="fontello fontello-search" id="icon-search"></i><i class="animate-spin  fontello fontello-spinner hide" id="spin-search"></i></button>
              </span>
            </div>
          </div>
        </form>
        <!-- 心知天气-->
        <div id="tp-weather-widget" class="navbar-form navbar-form-sm navbar-left shift"></div>
        <script>(function(T,h,i,n,k,P,a,g,e){g=function(){P=h.createElement(i);a=h.getElementsByTagName(i)[0];P.src=k;P.charset="utf-8";P.async=1;a.parentNode.insertBefore(P,a)};T["ThinkPageWeatherWidgetObject"]=n;T[n]||(T[n]=function(){(T[n].q=T[n].q||[]).push(arguments)});T[n].l=+new Date();if(T.attachEvent){T.attachEvent("onload",g)}else{T.addEventListener("load",g,false)}}(window,document,"script","tpwidget","//widget.seniverse.com/widget/chameleon.js"))</script>
        <script>tpwidget("init", {
            "flavor": "slim",
            "location": "WX4FBXXFKE4F",
            "geolocation": "enabled",
            "language": "auto",
            "unit": "c",
            "theme": "chameleon",
            "container": "tp-weather-widget",
            "bubble": "enabled",
            "alarmType": "badge",
            "color": "#C6C6C6",
            "uid": "填写你的公钥",
            "hash": "填写你的私钥"
        });
        tpwidget("show");</script>
        <!-- 心知结束-->
          <a href="" style="display: none" id="searchUrl"></a>
        <!-- / search form -->
十九:心情文字居中
展开查看详情
修改/usr/themes/handsome/index.php文件,位于公告位置下方
<header class="bg-light lter b-b wrapper-md">
替换成
<header class="bg-light lter b-b wrapper-md" style="text-align:center">
二十:去除顶部博客名称
展开查看详情
修改/usr/themes/handsome/index.php文件,位于公告位置下方
删除以下代码
删除以下代码
<h1 class="m-n font-thin h3 text-black l-h"><?php $this->options->title(); ?></h1>
二十一:去除文章底部修改日期及版权说明
展开查看详情
修改/usr/themes/handsome/libs/Content.php文件,大概570行左右
删除以下内容
删除以下内容
return '
             <div class="show-foot">
                 <div class="notebook">
                     <i class="fontello fontello-clock-o"></i>
                     <span>'._mt("最后修改").':'.date(_mt("Y 年 m 月 d 日 h : i  A") , $time + $obj).'</span>
                 </div>
                 <div class="copyright" data-toggle="tooltip" data-html="true" data-original-title="'.$interpretation.'"><span>© '.$content.'</span>
                 </div>
             </div>
        ';
二十二:去除文章页分享按钮
展开查看详情
修改/usr/themes/handsome/libs/Content.php文件,大概133行左右,删除以下代码
echo  '
              <div style="float:right;">
   '._mt("分享到").':
   <style>
   .breadcrumb i.iconfont.icon-qzone:after {
    padding: 0 0 0 5px;
    color: #ccc;
    content: "/\00a0";
    }
    '.$screenshotStyle.'
   </style>
   <a href="http://sns.qzone.qq.com/cgi-bin/qzshare/cgi_qzshare_onekey?url='.$archive->permalink.'&title='.$archive->title.'&site='.$WebUrl.'" itemprop="breadcrumb" target="_blank" title="" data-toggle="tooltip" data-original-title="'._mt("分享到QQ空间").'" onclick="window.open(this.href, \'qzone-share\', \'width=550,height=335\');return false;"><i style ="font-size:15px;" class="iconfont icon-qzone" aria-hidden="true"></i></a>
   <a href="http://service.weibo.com/share/share.php?url='.$archive->permalink.'&title='.$archive->title.'" target="_blank" itemprop="breadcrumb" title="" data-toggle="tooltip" data-original-title="'._mt("分享到微博").'" onclick="window.open(this.href, \'weibo-share\', \'width=550,height=335\');return false;"><i style ="font-size:15px;" class="fontello fontello-weibo" aria-hidden="true"></i></a>'.$screenshot.'</div>';
二十三:首页文章版式阴影化
展开查看详情
主题设置 - 开发者设置 - 自定义CSS添加以下代码
#阴影颜色修改rgba后面的值
/*panel阴影*/
.panel{
   box-shadow: 1px 1px 5px 5px rgba(255, 112, 173, 0.35);
    -moz-box-shadow: 1px 1px 5px 5px rgba(255, 112, 173, 0.35);
}

.panel:hover{
    box-shadow: 1px 1px 5px 5px rgba(255, 112, 173, 0.35);
    -moz-box-shadow: 1px 1px 5px 5px rgba(255, 112, 173, 0.35);
}

.panel-small{
    box-shadow: 1px 1px 5px 5px rgba(255, 112, 173, 0.35);
    -moz-box-shadow: 1px 1px 5px 5px rgba(255, 112, 173, 0.35);
}

.panel-small:hover{
    box-shadow: 1px 1px 5px 5px rgba(255, 112, 173, 0.35);
    -moz-box-shadow: 1px 1px 5px 5px rgba(255, 112, 173, 0.35);
}
#如果也想使盒子四周也有阴影,加上以下代码
.app.container {
    box-shadow: 0 0 30px rgba(255, 112, 173, 0.35);
}
二十四:博客介绍彩色特效
展开查看详情
后台 - 设置外观 - 初级设置 - 博客介绍添加以下代码
<span class="text-muted text-xs block"><div id="chakhsu"></div> <script> var chakhsu = function (r) {function t() {return b[Math.floor(Math.random() * b.length)]} function e() {return String.fromCharCode(94 * Math.random() + 33)} function n(r) {for (var n = document.createDocumentFragment(), i = 0; r > i; i++) { var l = document.createElement("span"); l.textContent = e(), l.style.color = t(), n.appendChild(l) } return n}function i() {var t = o[c.skillI]; c.step ? c.step-- : (c.step = g, c.prefixP < l.length ? (c.prefixP >= 0 && (c.text += l[c.prefixP]), c.prefixP++) : "forward" === c.direction ? c.skillP < t.length ? (c.text += t[c.skillP], c.skillP++) : c.delay ? c.delay-- : (c.direction = "backward", c.delay = a) : c.skillP > 0 ? (c.text = c.text.slice(0, -1), c.skillP--) : (c.skillI = (c.skillI + 1) % o.length, c.direction = "forward")), r.textContent = c.text, r.appendChild(n(c.prefixP < l.length ? Math.min(s, s + c.prefixP) : Math.min(s, t.length - c.skillP))), setTimeout(i, d) } /*以下内容自定义修改*/ var l = "❤", o = ["何须仰望别人,自己亦是风景" ].map(function (r) {return r + ""}), a = 2, g = 1, s = 5, d = 75, b = ["rgb(110,64,170)", "rgb(150,61,179)", "rgb(191,60,175)", "rgb(228,65,157)", "rgb(254,75,131)", "rgb(255,94,99)", "rgb(255,120,71)", "rgb(251,150,51)", "rgb(226,183,47)", "rgb(198,214,60)", "rgb(175,240,91)", "rgb(127,246,88)", "rgb(82,246,103)", "rgb(48,239,130)", "rgb(29,223,163)", "rgb(26,199,194)", "rgb(35,171,216)", "rgb(54,140,225)", "rgb(76,110,219)", "rgb(96,84,200)"], c = {text: "", prefixP: -s, skillI: 0, skillP: 0, direction: "forward", delay: a, step: g}; i() }; chakhsu(document.getElementById('chakhsu')); </script> </span> </span>
二十五:博客版权简单美化
展开查看详情
主题设置 - 开发者设置 - 博客底部右侧信息
<div class="github-badge">
<a rel="license" href="http://beian.miit.gov.cn/" target="_blank" title="渝ICP备XXXXXX号">
<span class="badge-subject">渝ICP备</span><span class="badge-value bg-black">XXXXXX号</span></a>
</div>
 |  <div class="github-badge">
<a rel="license" href="http://www.typecho.org" target="_blank" title="由Typecho强力驱动">
<span class="badge-subject">Powered</span><span class="badge-value bg-blue">Typecho</span></a>
</div>
 |  <div class="github-badge">
<a rel="license" href="https://www.ihewro.com/archives/489/" target="_blank" title="站点使用 handsome 主题,作者:友人C">
<span class="badge-subject">Theme</span><span class="badge-value bg-orange">Handsome</span></a>
</div>
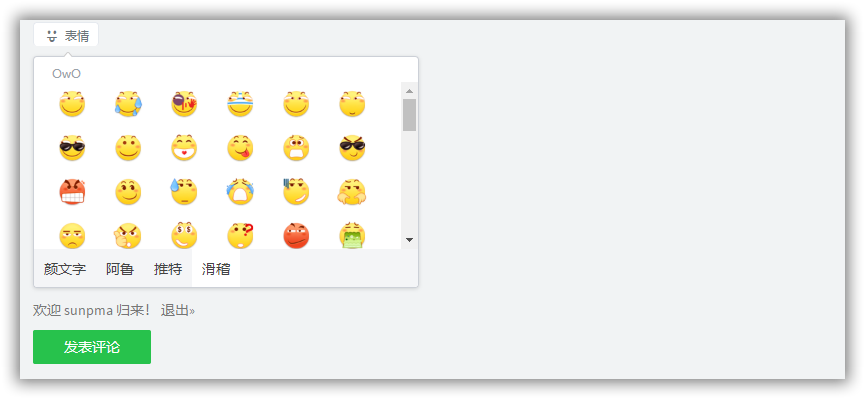
二十六:滑稽表情
展开查看详情

解压后会得到一个OwO.json文件及funny文件夹;
然后将funny文件夹放置在/usr/themes/handsome/usr/img/emotion目录下即可;
然后用我们解压得到的OwO.json文件替换掉/usr/themes/handsome/usr目录下的OwO.json文件即可;
二十七:顶部RSS图标
展开查看详情
主图设置 - 高级设置 - 顶部导航按钮配置
{"name":"RSS","class":"fontello fontello-rss icon-fw","link":"https://sunpma.com/feed/","target":"_blank"}
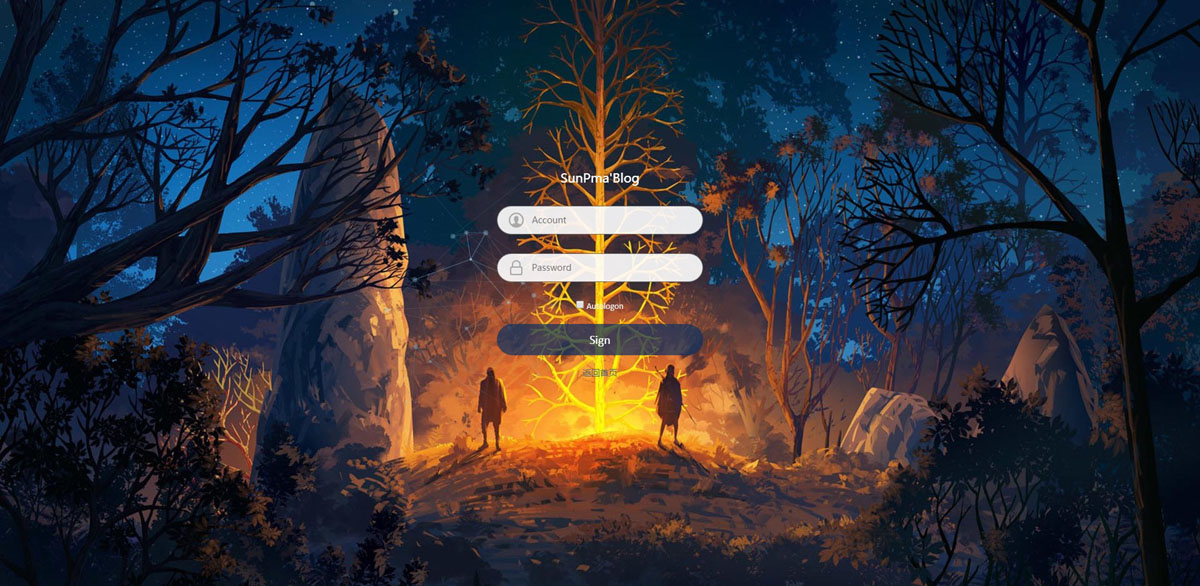
二十八:后台登陆界面美化
展开查看详情

方法:
第一步:用压缩包内的login.php文件替换掉/admin/login.php文件
第二步:将压缩包内的style文件夹上传到/admin/文件夹下
第三步:修改login.php第35行,把“SunPma'Blog”替换成自己的信息
二十九:文章页添加百度收录查询
展开查看详情
在主题functions.php文件最下方添加以下代码
/**
* 提示文章百度是否收录
*
*/
function baidu_record() {
$url='http://'.$_SERVER['HTTP_HOST'].$_SERVER['REQUEST_URI'];

if(checkBaidu($url)==1)
{echo "百度已收录";
}
else
{echo "<a style=\"color:red;\" rel=\"external nofollow\" title=\"点击提交收录!\" target=\"_blank\"
href=\"http://zhanzhang.baidu.com/sitesubmit/index?sitename=$url\">百度未收录</a>";}
}
function checkBaidu($url) {
$url = 'http://www.baidu.com/s?wd=' . urlencode($url);
$curl = curl_init();
curl_setopt($curl, CURLOPT_URL, $url);
curl_setopt($curl, CURLOPT_RETURNTRANSFER, 1);
$rs = curl_exec($curl);
curl_close($curl);
if (!strpos($rs, '没有找到')) { //没有找到说明已被百度收录
return 1;
} else {
return -1;
}
}
在主题post.php文件想要显示的地方添加以下代码
    <!--百度收录-->
<li class="meta-categories"><i class="glyphicon glyphicon-ok-circle" aria-hidden="true"></i>
<span class="sr-only"><?php _me("百度收录") ?>:</span> <span class="meta-value"><?php echo
baidu_record() ?></span></li>
三十:文章图片居中并显示注释
展开查看详情
插入代码
修改方法
typecho安装目录下的var/HyperDown.php搜索image第357行找到如下代码
<img src=\"{$url}\" alt=\"{$escaped}\" title=\"{$escaped}\">
# 替换为以下代码
<img class=\"img\" src=\"{$url}\" alt=\"{$escaped}\" title=\"{$escaped}\"><center><div class=\"image-caption\">{$escaped}</div></center>
主题设置 - 开发者设置 - 自定义CSS添加以下代码
/*设置图片插入居中*/
.img {clear:both;display:block;margin:auto;}
/* 设置注释样式*/
.image-caption{
min-width: 20%;
    max-width: 80%;
    min-height: 22px;
    display: inline-block;
    padding: 10px;
    margin: 0 auto;
    border-bottom: 1px solid #d9d9d9;
    font-size: 14px;
    color: #969696;
    line-height: 1.7;
}
默认的字体颜色是配合非透明模式的,透明模式将上面color: #969696修改为color:white
三十一:评论添加一键打卡
展开查看详情
主题设置 - 开发者设置 - 自定义JavaScript 和 PJAX回调函数 均添加上以下代码
function a(a, b, c) {
        if (document.selection) a.focus(), sel = document.selection.createRange(), c ? sel.text = b + sel.text + c : sel.text = b, a.focus();
        else if (a.selectionStart || "0" == a.selectionStart) {
            var l = a.selectionStart,
                m = a.selectionEnd,
                n = m;
            c ? a.value = a.value.substring(0, l) + b + a.value.substring(l, m) + c + a.value.substring(m, a.value.length) : a.value = a.value.substring(0, l) + b + a.value.substring(m, a.value.length);
            c ? n += b.length + c.length : n += b.length - m + l;
            l == m && c && (n -= c.length);
            a.focus();
            a.selectionStart = n;
            a.selectionEnd = n
        } else a.value += b + c, a.focus()
}
var b = (new Date).toLocaleTimeString(),
        c = document.getElementById("comment") || 0;
window.SIMPALED = {};
window.SIMPALED.Editor = {
    daka: function() {
        a(c, "滴!学生卡!打卡时间:" + b, ",请上车的乘客系好安全带~")
    },
    zan: function() {
        a(c, " 写得好好哟,我要给你生猴子!::funny:04:: ")
    },
    cai: function() {
        a(c, "骚年,我怀疑你写了一篇假的文章!::funny:03:: ")
    }
};
主题目录的component/comments.php里面的130行左右参照下面代码进行修改
                            <label for="comment"><?php _me("评论") ?>
                            <span class="required text-danger">*</span></label>
                        <textarea id="comment" class="textarea form-control OwO-textarea" name="text" rows="5" placeholder="<?php _me("说点什么吧……") ?>" onkeydown="if(event.ctrlKey&&event.keyCode==13){document.getElementById('submit').click();return false};"><?php $this->remember('text'); ?></textarea>
                        <div class="OwO" style="display: inline;"></div>
                                            <div class="OwO" title="打卡" style="display: inline;" onclick="javascript:SIMPALED.Editor.daka();this.style.display='none'"><div class="OwO-logo"><i class="fontello-pencil"></i><span class="OwOlogotext">打卡</span></div></div>
              <div class="OwO" title="赞" style="display: inline;" onclick="javascript:SIMPALED.Editor.zan();this.style.display='none'"><div class="OwO-logo"><i class="glyphicon glyphicon-thumbs-up"></i><span class="OwOlogotext"></span></div></div>
          <div class="OwO" title="踩" style="display: inline;" onclick="javascript:SIMPALED.Editor.cai();this.style.display='none'"><div class="OwO-logo"><i class="glyphicon glyphicon-thumbs-down"></i><span class="OwOlogotext"></span></div></div>
                        <div class="secret_comment" id="secret_comment" data-toggle="tooltip"
                        data-original-title="<?php _me("开启该功能,您的评论仅作者和评论双方可见") ?>">
主题设置 - 开发者设置 - 自定义CSS 添加以下代码
.secret_comment {
    top: 5px;
}
.OwO.OwO-open .OwO-body {
    display:table
}
三十二:访客总数统计
展开查看详情
在/usr/themes/handsome/functions.php文件中添加以下统计代码
//总访问量
    function theAllViews()
        {
            $db = Typecho_Db::get();
            $row = $db->fetchAll('SELECT SUM(VIEWS) FROM `typecho_contents`');
                echo number_format($row[0]['SUM(VIEWS)']);
        }
在/usr/themes/handsome/component/sidebar.php文件中插入以下调用代码
<li class="list-group-item"> <i class="glyphicon glyphicon-user text-muted"></i> <span class="badge
pull-right"><?php echo theAllViews();?></span><?php _me("访客总数") ?></li>
实际效果
其他主题单独调用代码
<?php echo theAllViews();?></span><?php _me("访客总数") ?>
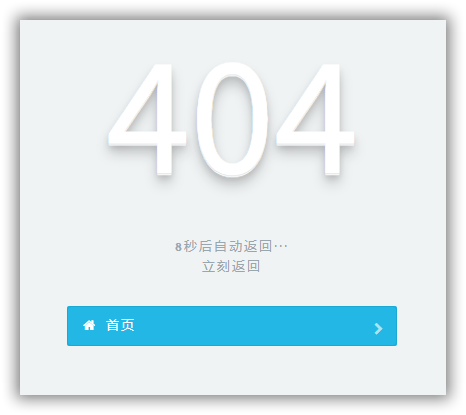
三十三:404自动返回首页
展开查看详情
在/usr/themes/handsome/404.php文件130行左右添加以下代码
添加在
添加在
404
这行下面即可<br>
<small class="text-muted letterspacing">
<b id="sp">10</b>秒后自动返回···<br>
<a class="text-muted letterspacing" href="#" onclick="javascript:history.go(-1);">立刻返回</a>再在最后面

4 条评论
很棒的网站!感谢分享,谢谢站长!!@天天下载Ttzip
wow!!很实用
很厉害(ง •̀_•́)ง
谢谢